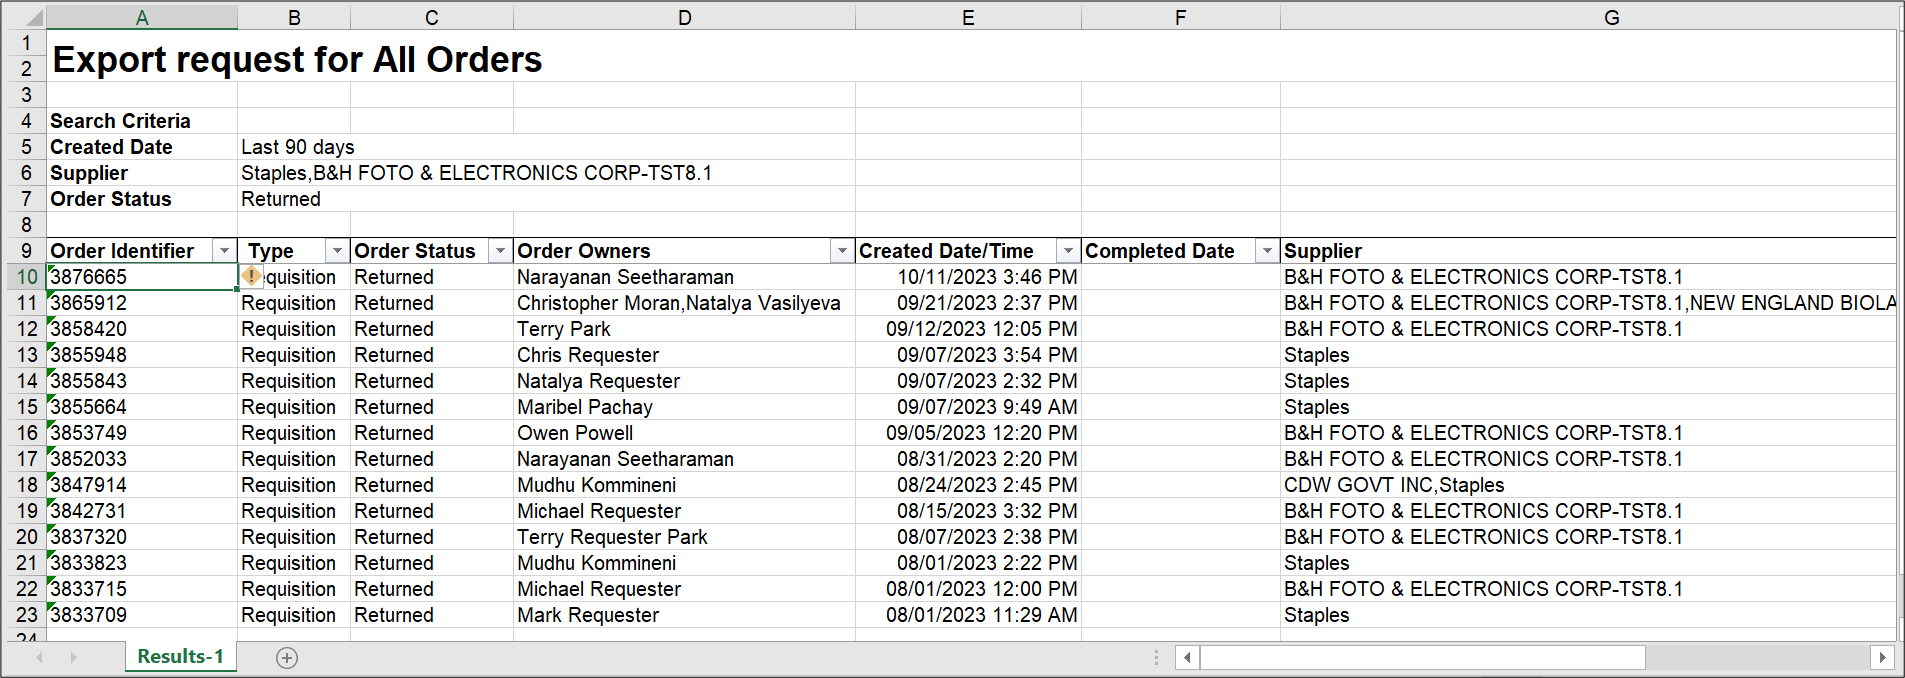
How to search, view, and export document reports
A PDF version of this tip is available to view and print.
What is it?
The CU Marketplace comes with powerful Search functionality enabling you to produce reports that you can filter and refine. You can save and organize Searches to easily run them again to get the most up to date information. In addition, Search results can be exported to Excel. For more details, refer to Searching for Documents and Running Reports in the CU Marketplace Training Guide.
Using the Orders Search Menu
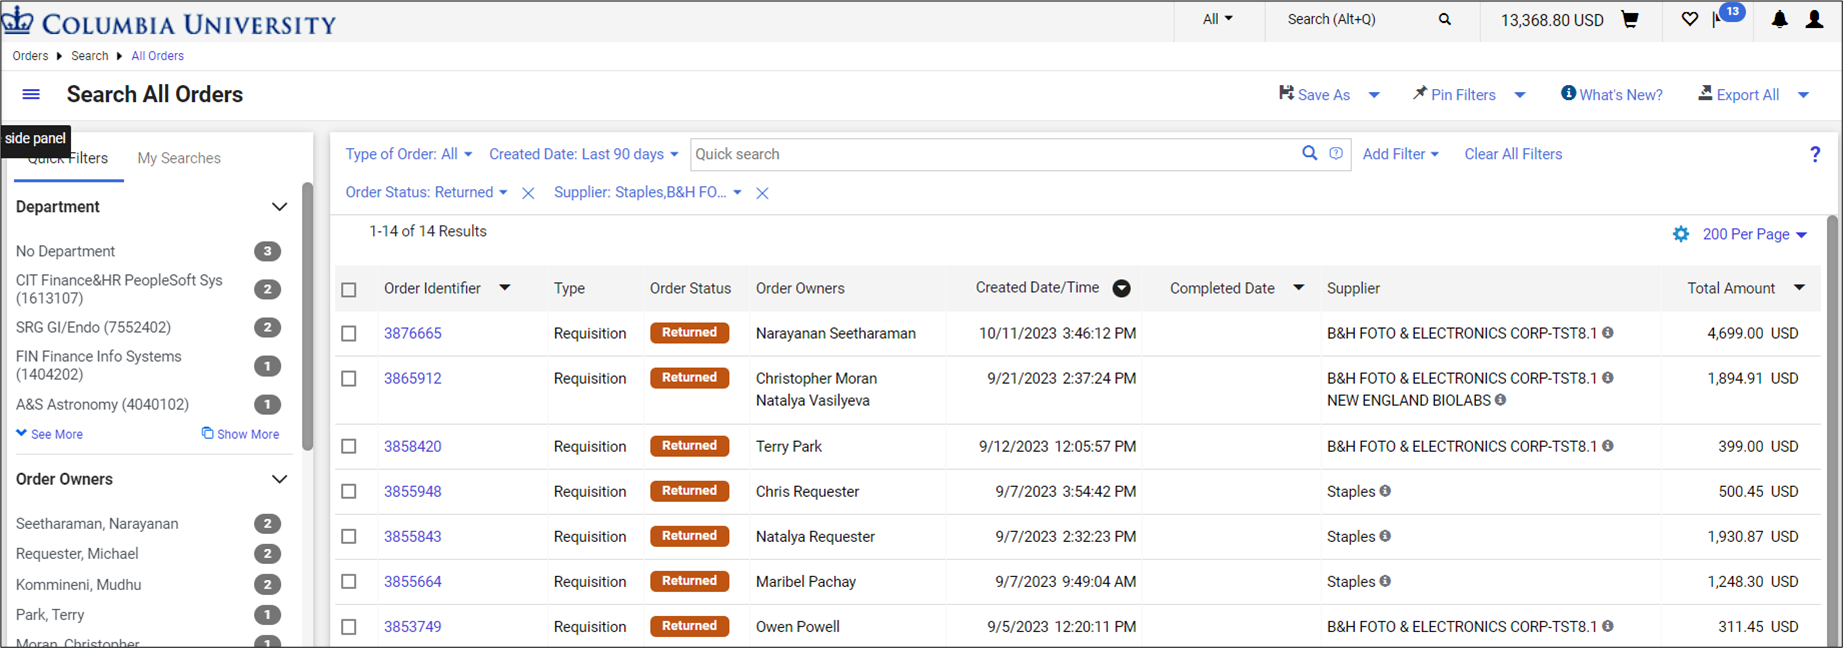
You can use the Orders Search Menu to navigate to lists containing all of your Requisitions, Purchase Orders, Vouchers, or All Orders. The Orders menu also contains a Quick Search field to search for specific documents.
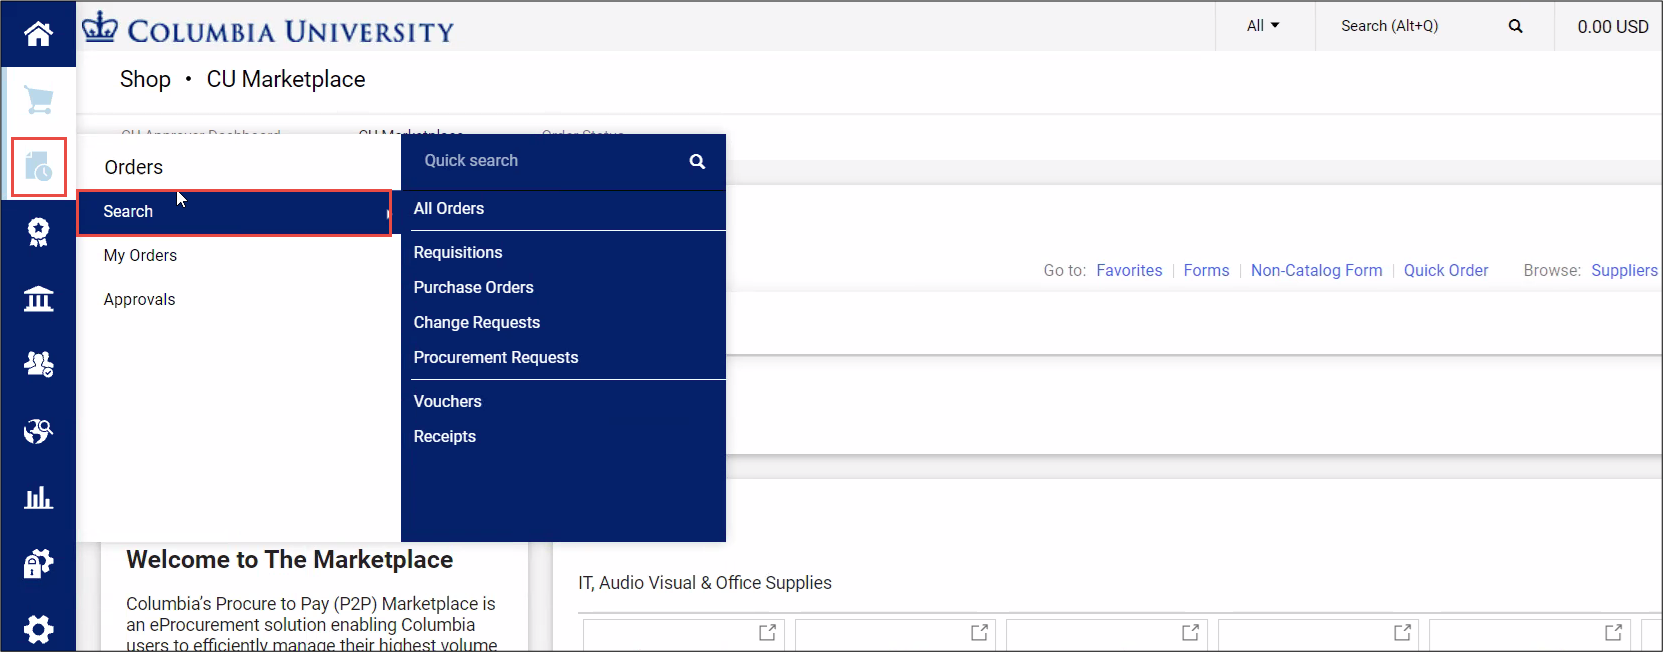
1. Click the Orders icon, the Search menu, and then select type of document to view. The Search screen appears for the type of document you selected.
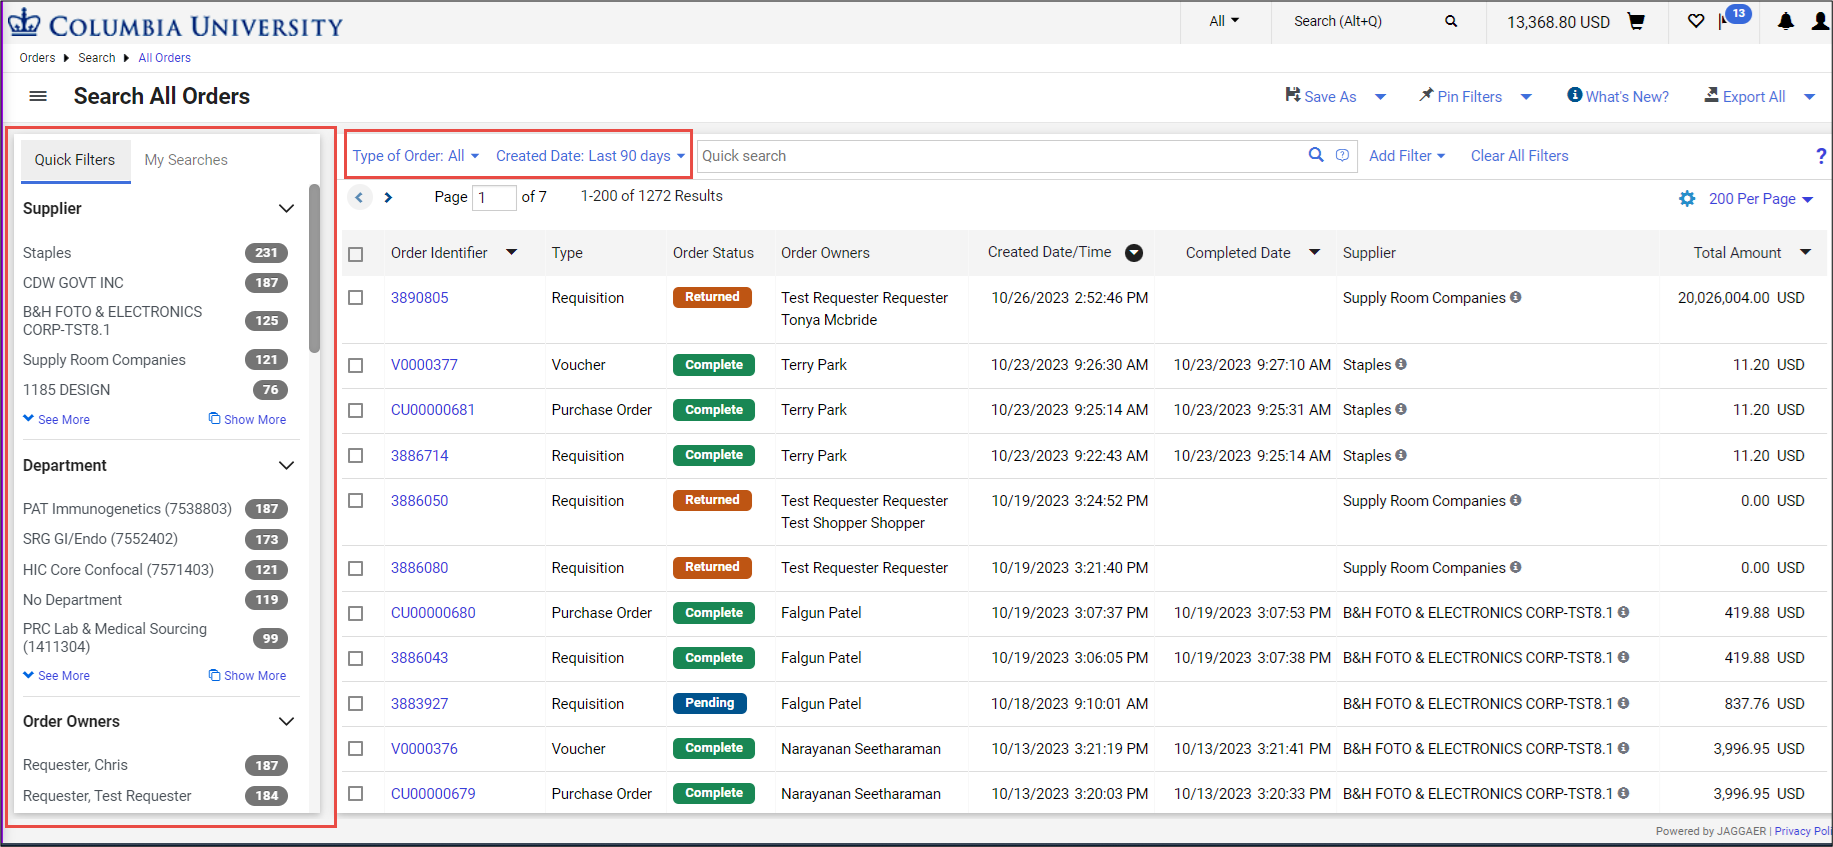
You can use the Quick Filters section on the left or the filters above the list to narrow the list to those documents that contain specific attributes.
2. Click the Add Filter button and select Filters to add that you can then use to find specific documents.

The Filter(s) you added appear above the list column headers.

3. Enter or select the desired values in the Filters you added and click Apply for each filter.
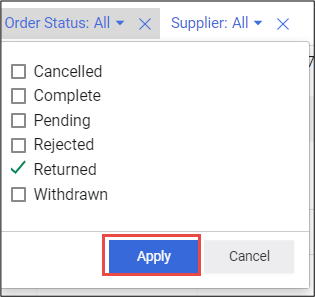
The list will be filtered based on your desired values.
Exporting Your Search List
After your Search list contains the desired information, you can export the whole list or select individual rows to export to Excel.
1. Click the dropdown menu next to the Export All button. If you selected the checkboxes for individual rows to be exported, you can select Export Selected Rows. If you want to export all rows, select Export All.

The Export Orders window appears.
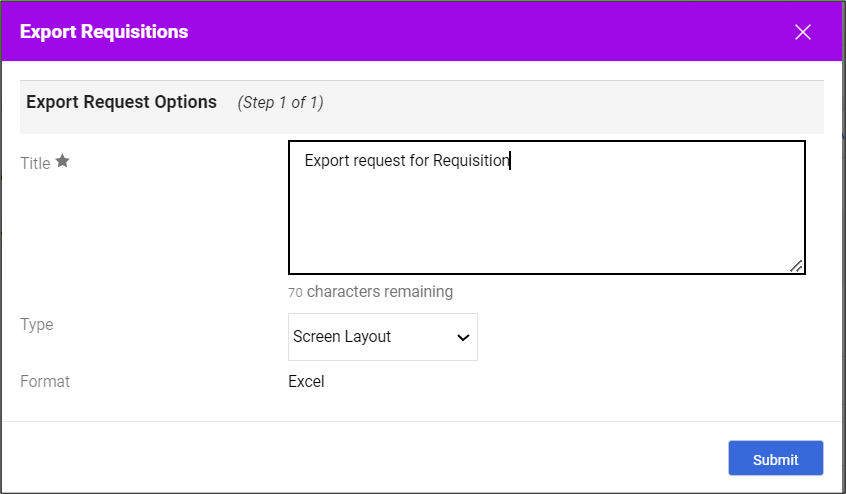
2. The Title field can be edited to reflect the data you are exporting.
3. Select the desired Type from the dropdown.
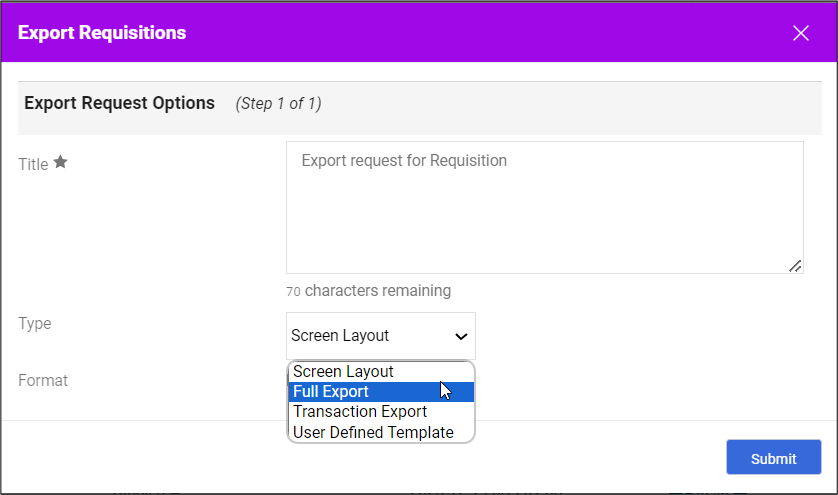
Screen Layout - Exports the search results as an Excel file exactly as they appear on the screen with no additional data.
Full Export - Exports all information available about the transaction associated with each document in CSV format. Full exports also include document history such as approvals, comments and more.
Transaction Export – Exports all information available about the transaction associated with each document in CSV format, but unlike the Full Export, does not include document history.
User Defined Templates - Access to custom templates that are configured to export specific fields and files.
4. Click the Submit button. A Success message appears with information on where you can retrieve the file.

5. Click the dropdown next to Export All and select Manage Search Exports.

The Manage Exports screen appears.

6. Click the Title of the file to export. The file will be available to download from your browser.
